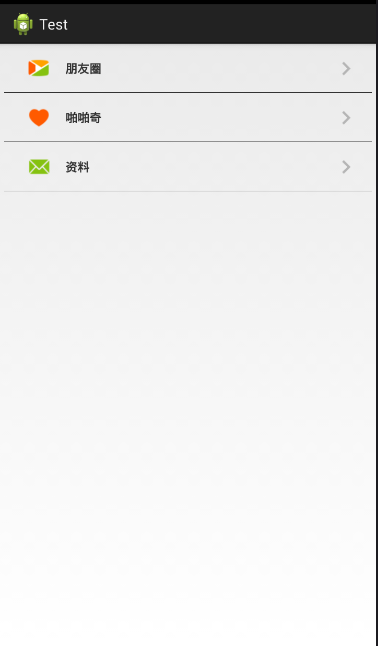
大家看到这个觉得这不是很简单的吗,这不就是写个布局文件就搞定嘛,没错,确实直接上布局就行,不过,我只是用这个简单的例子来讲一下自定义组合控件的用法。
首先看看,这一行行的条目看起来都长得差不多,只是图片和文字不一样,没错,就是看中这一点,我们可以把一个条目做成一个组合控件,做为一个整体,这样不管你有几个条目,就写几个组合控件就行了。
步骤:
1.先建立组合控件的布局
myView.xml
<RelativeLayout xmlns:android="http://schemas.android.com/apk/res/android" android:layout_width="match_parent" android:layout_height="60dp" > <ImageViewandroid:id="@+id/icon_Iv"android:layout_width="35dp"android:layout_height="35dp"android:layout_centerVertical="true"android:layout_marginLeft="30dp"android:src="@drawable/phone_qiyi_explore_friends" /> <TextViewandroid:id="@+id/tv"android:layout_width="wrap_content"android:layout_height="match_parent"android:layout_marginLeft="80dp"android:gravity="center"android:text="朋友圈"android:textSize="15sp"android:textStyle="bold" /> <ImageViewandroid:layout_width="wrap_content"android:layout_height="match_parent"android:layout_alignParentRight="true"android:layout_marginRight="20dp"android:src="@drawable/phone_my_inc_arrow" /> <Viewandroid:layout_width="match_parent"android:layout_height="0.5dp"android:layout_alignParentBottom="true"android:layout_marginLeft="5dp"android:layout_marginRight="5dp"android:background="#000" /></RelativeLayout>
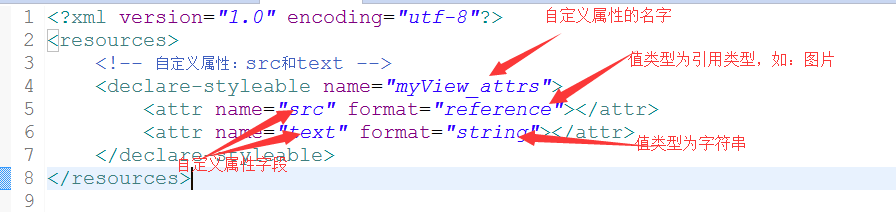
2.自定义属性(图片资源和文本)
在values/目录下新建attrs.xml文件
attrs.xml:
<?xml version="1.0" encoding="utf-8"?><resources> <!-- 自定义属性:src和text --> <declare-styleable name="myView_attrs"><attr name="src" format="reference"></attr><attr name="text" format="string"></attr> </declare-styleable></resources>
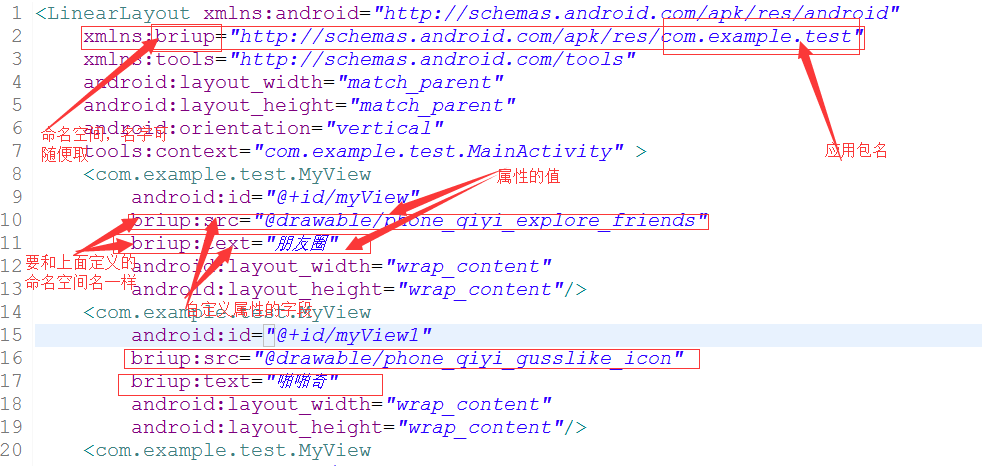
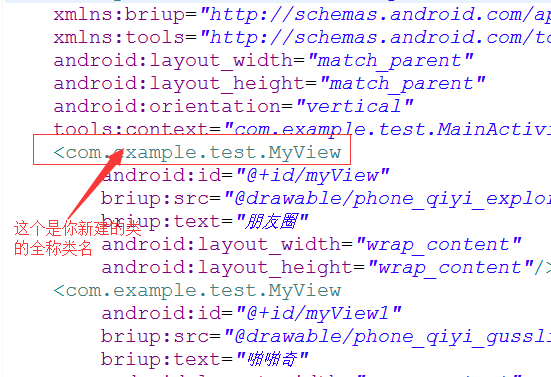
3.新建一个类MyView继承RelativeLayout,将自定义的布局文件加载进来并且获取自定义的属性,然后取得自定义属性字段的值,最后将相应的值设置在相应的组件上
/** * 自定义组合控件(包括一个ImageView和TextView) * @author Administrator * */public class MyView extends RelativeLayout{ private TextView tv; private ImageView icon_Iv; public MyView(Context context) {this(context,null); } public MyView(Context context, AttributeSet attrs) {super(context, attrs);initView(context);//拿到自定义的属性TypedArray ta = context.obtainStyledAttributes(attrs, R.styleable.myView_attrs);//获取自定义属性的值String text = ta.getString(R.styleable.myView_attrs_text);Drawable drawable = ta.getDrawable(R.styleable.myView_attrs_src);//把值设置到相应组件上icon_Iv.setImageDrawable(drawable);tv.setText(text); } private void initView(Context context) {//把自定义的布局加载进来View.inflate(context,R.layout.myview,this);//找到布局中的组件icon_Iv = (ImageView) this.findViewById(R.id.icon_Iv);tv = (TextView) this.findViewById(R.id.tv); }}4.在main.xml文件中添加自定义组合控件<LinearLayout xmlns:android="http://schemas.android.com/apk/res/android xmlns:briup="http://schemas.android.com/apk/res/com.example.test" xmlns:tools="http://schemas.android.com/tools" android:layout_width="match_parent" android:layout_height="match_parent" android:orientation="vertical" tools:context="com.example.test.MainActivity" > <com.example.test.MyViewandroid:id="@+id/myView"briup:src="@drawable/phone_qiyi_explore_friends"briup:text="朋友圈" android:layout_width="wrap_content"android:layout_height="wrap_content"/> <com.example.test.MyViewandroid:id="@+id/myView1"briup:src="@drawable/phone_qiyi_gusslike_icon"briup:text="啪啪奇" android:layout_width="wrap_content"android:layout_height="wrap_content"/> <com.example.test.MyViewandroid:id="@+id/myView2"briup:text="消息" briup:src="@drawable/phone_qiyi_message_icon"android:layout_width="wrap_content"android:layout_height="wrap_content"/></LinearLayout>
注:
做到以上步骤就可以了,希望本文所述对大家学习Android自定义控件有所帮助。