public class TabHostActivity extends TabActivity { private TabHost tabHost; private Intent certificateIntent; private Intent feeIntent; private Intent scoreIntent; private Intent studyIntent; private Intent moreIntent;@Override publicvoid onCreate(Bundle savedInstanceState) {super.onCreate(savedInstanceState);tabHost = getTabHost();initIntent();addSpec(); } /*** 初始化各个tab标签对应的intent*/ privatevoid initIntent() {studyIntent = new Intent(this, StudyActivity.class);scoreIntent = new Intent(this, ScoreActivity.class);feeIntent = new Intent(this, FeeActivity.class);certificateIntent = new Intent(this, CertificateActivity.class);moreIntent = new Intent(this, MoreActivity.class); } /*** 为tabHost添加各个标签项*/ privatevoid addSpec() {tabHost.addTab(this.buildTagSpec("tab_study",R.string.study_progress,R.drawable.account01, studyIntent)); tabHost.addTab(this.buildTagSpec("tab_score",R.string.test_score,R.drawable.account02, scoreIntent));tabHost.addTab(this.buildTagSpec("tab_fee",R.string.fee_pay,R.drawable.account03, feeIntent));tabHost.addTab(this.buildTagSpec("tab_certificate", R.string.certificate_grant,R.drawable.accountcertificateIntent));tabHost.addTab(this.buildTagSpec("tab_more", R.string.more,R.drawable.account05, moreIntent)); } /*** 自定义创建标签项的方法* @param tagName 标签标识* @param tagLable 标签文字* @param icon 标签图标* @param content 标签对应的内容* @return*/ private TabHost.TabSpec buildTagSpec(String tagName, int tagLable, int icon, Intent content) {returntabHost.newTabSpec(tagName).setIndicator(getResources().getString(tagLable),getResources().getDrawable(icon)).setContent(content); }}运行结果如下图所示 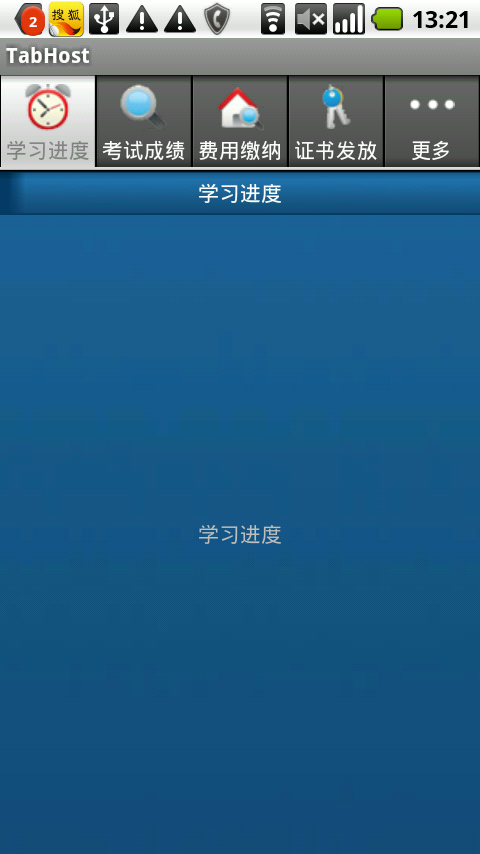
我们发现标签位置处于界面上方,但是我们看到的很多应用的标签都处于界面底部。
如下图所示
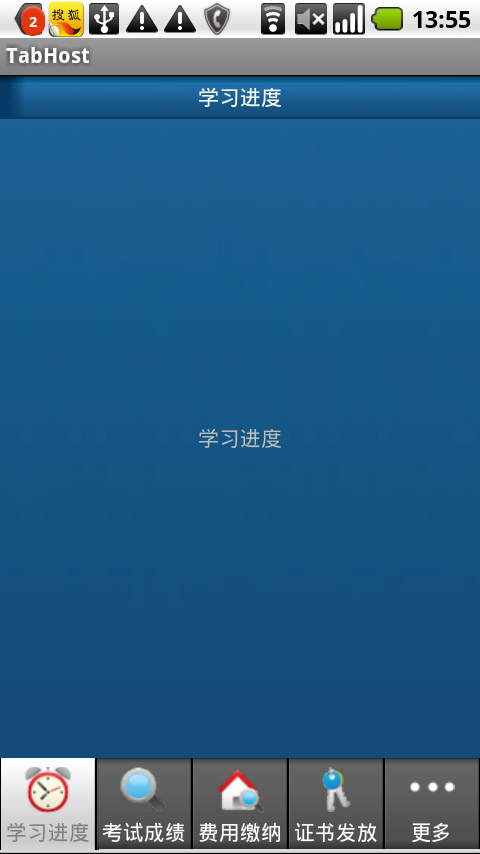
我们要实现这种效果只需要将TabActivity的默认布局覆盖即可。新布局只需将标签和标签对应内容的相对位置调换一下就可以了,这里是用相对布局将标签对应内容的位置放到了标签的上方。不要改动id(会抛异常,提示必须要用指定的id)。不要忘了在onCreate()里设置新布局将TabActivity的默认布局覆盖。
@Override publicvoid onCreate(Bundle savedInstanceState) {super.onCreate(savedInstanceState);setContentView(R.layout.tab);tabHost = getTabHost();initIntent();addSpec(); }tab.xml<?xml version="1.0" encoding="UTF-8"?><!-- TabHost组件id值不可变--><TabHostxmlns:android=http://schemas.android.com/apk/res/android android:id="@android:id/tabhost" android:layout_height="fill_parent" android:layout_width="fill_parent"><RelativeLayout android:orientation="vertical"android:layout_width="fill_parent"android:layout_height="fill_parent"><!-- TabWidget组件id值不可变--><TabWidget android:id="@android:id/tabs" android:layout_width="fill_parent" android:layout_height="wrap_content" android:layout_alignParentBottom="true"></TabWidget><!-- FrameLayout布局,id值不可变--><FrameLayout android:id="@android:id/tabcontent" android:layout_width="fill_parent" android:layout_height="fill_parent" android:layout_above="@android:id/tabs"></FrameLayout> </RelativeLayout></TabHost>通常在项目中我们都会有一个自定义的Activity基类,我们会让所有的界面Activity去继承这个基类。但是要使用TabHost就要继承TabActivity,所以我们可以定义两个基类,一个是普通Activity界面的基类,另一个是包含TabHost界面的基类,让这个基类继承TabActivity即可。
public class TabHostActivity extends Activity implementsOnCheckedChangeListener { private TabHost tabHost;private Intent certificateIntent; private Intent feeIntent; private Intent scoreIntent; private Intent studyIntent; private Intent moreIntent;@Override publicvoid onCreate(Bundle savedInstanceState) {super.onCreate(savedInstanceState);setContentView(R.layout.tab);// tabHost = getTabHost();tabHost = (TabHost) findViewById(R.id.my_tabhost);LocalActivityManager groupActivity =new LocalActivityManager(this,false);groupActivity.dispatchCreate(savedInstanceState);tabHost.setup(groupActivity);initIntent();addSpec();((RadioGroup) findViewById(R.id.tab_radiogroup)).setOnCheckedChangeListener(this);}/*** 初始化各个tab标签对应的intent*/ privatevoid initIntent() {studyIntent = new Intent(this, StudyActivity.class);scoreIntent = new Intent(this, ScoreActivity.class);feeIntent = new Intent(this, FeeActivity.class);certificateIntent = new Intent(this, CertificateActivity.class);moreIntent = new Intent(this, MoreActivity.class); }/*** 为tabHost添加各个标签项*/ privatevoid addSpec() {tabHost.addTab(this.buildTagSpec("tab_study", R.string.study_progress,R.drawable.account01, studyIntent));tabHost.addTab(this.buildTagSpec("tab_score", R.string.test_score,R.drawable.account02, scoreIntent));tabHost.addTab(this.buildTagSpec("tab_fee", R.string.fee_pay,R.drawable.account03, feeIntent));tabHost.addTab(this.buildTagSpec("tab_certificate",R.string.certificate_grant, R.drawable.account04,certificateIntent));tabHost.addTab(this.buildTagSpec("tab_more", R.string.more,R.drawable.account05, moreIntent)); }/*** 自定义创建标签项的方法* @param tagName 标签标识* @param tagLable 标签文字* @param icon 标签图标* @param content 标签对应的内容* @return*/ private TabHost.TabSpec buildTagSpec(String tagName, int tagLable, int icon, Intent content) {returntabHost.newTabSpec(tagName).setIndicator(getResources().getString(tagLable),getResources().getDrawable(icon)).setContent(content); }@Override public void onCheckedChanged(RadioGroup group, int checkedId) {switch (checkedId) {case R.id.radio_button_study: tabHost.setCurrentTabByTag("tab_study"); break;case R.id.radio_button_score: tabHost.setCurrentTabByTag("tab_score"); break;case R.id.radio_button_certificate: tabHost.setCurrentTabByTag("tab_certificate"); break;case R.id.radio_button_fee: tabHost.setCurrentTabByTag("tab_fee"); break;case R.id.radio_button_more: tabHost.setCurrentTabByTag("tab_more"); break;}}}tab.xml<?xml version="1.0" encoding="UTF-8"?><TabHost android:id="@+id/my_tabhost" android:layout_width="fill_parent" android:layout_height="fill_parent" xmlns:android="http://schemas.android.com/apk/res/android"> <LinearLayout android:orientation="vertical"android:layout_width="fill_parent" android:layout_height="fill_parent"><FrameLayout android:id="@android:id/tabcontent" android:layout_width="fill_parent" android:layout_height="0.0dip"android:layout_weight="1.0" /><TabWidget android:id="@android:id/tabs" android:visibility="gone"android:layout_width="fill_parent" android:layout_height="wrap_content" android:layout_weight="0.0" /><RadioGroup android:id="@+id/tab_radiogroup"android:background="@drawable/tabs_bg" android:layout_width="fill_parent" android:layout_height="wrap_content" android:gravity="center_vertical" android:layout_gravity="bottom" android:orientation="horizontal"> <RadioButton android:id="@+id/radio_button_study"android:layout_marginTop="2.0dip" android:text="学习进度"android:drawableTop="@drawable/account01" style="@style/tab_button_bottom"android:checked="true" /> <RadioButton android:id="@+id/radio_button_score"android:layout_marginTop="2.0dip" android:text="考试成绩"android:drawableTop="@drawable/account02" style="@style/tab_button_bottom" /> <RadioButton android:id="@+id/radio_button_certificate"android:layout_marginTop="2.0dip" android:text="证书发放"android:drawableTop="@drawable/account03" style="@style/tab_button_bottom" /> <RadioButton android:id="@+id/radio_button_fee"android:layout_marginTop="2.0dip" android:text="费用缴纳"android:drawableTop="@drawable/account04" style="@style/tab_button_bottom" /> <RadioButton android:id="@+id/radio_button_more"android:layout_marginTop="2.0dip" android:text="更多"android:drawableTop="@drawable/account05" style="@style/tab_button_bottom" /></RadioGroup> </LinearLayout></TabHost>styles.xml
<?xml version="1.0" encoding="utf-8"?><resources> <!-- TabHost标签按钮样式 --> <style name="tab_button_bottom"><item name="android:textSize">12px</item><item name="android:textColor">#ffffffff</item><item name="android:ellipsize">marquee</item><item name="android:gravity">center_horizontal</item><item name="android:background">@drawable/tab_btn_bg</item><item name="android:layout_marginTop">2.0dip</item><item name="android:button">@null</item><item name="android:paddingTop">6dip</item><item name="android:drawablePadding">4dip</item><item name="android:layout_width">fill_parent</item><item name="android:layout_height">wrap_content</item><item name="android:layout_weight">1.0</item><item name="android:singleLine">true</item> </style><!-- 页面标题LinearLayout样式 --> <style name="activity_title_background"> <item name="android:background">@drawable/title_background</item><item name="android:layout_width">fill_parent</item><item name="android:layout_height">wrap_content</item><item name="android:layout_alignParentTop">true</item><item name="android:gravity">center</item> </style><!-- 界面标题TextView样式 --> <style name="activity_title_text"><item name="android:textSize">14dip</item><item name="android:textColor">@drawable/white</item><item name="android:layout_width">wrap_content</item><item name="android:layout_height">wrap_content</item><item name="android:gravity">center</item> </style></resources>运行结果如下图所示

程序重要部分:
1. 红色字体部分。
2. 布局文件tab.xml,可以看到该布局文件中将TabWidget隐藏(android:visibility="gone")而以一个RadioGroup取而代之。
3. 为RadioGroup设置OnCheckedChangeListener监听,通过onCheckedChanged方法对各个RadioButton点击事件的处理完成标签切换。
其实我当初考虑过为什么要用RadioButton而不用普通的Button。后来通过自己做项目,发现使用RadioGroup有以下优点:
1.另外就是布局上比较方便易懂,不用再去用LinearLayout等布局去包含Button。
2. 我们可以很方便的获得当前选中的标签,当然通过TabHost的tabHost.getCurrentTabTag()和getCurrentTab()也是可以的。
3.设置监听很方便,只需要为RadioGroup设置监听就行了,程序中对应的代码是
((RadioGroup) findViewById(R.id.tab_radiogroup)) .setOnCheckedChangeListener(this);如果用Button的话我们需要为所有的Button一个一个去设置监听,相对来说比较麻烦。
<RadioButton android:id="@+id/radio_button_more" android:layout_marginTop="2.0dip"android:text="更多" android:drawableTop="@drawable/account05" style="@style/tab_button_bottom" />当然如果如果RadioButton不能满足我们的项目需求,比如我们不需要图片又不想让文字靠底部显示,而是居中显示,这时我们就可以用其他组件代替RadioButton。其实我们可以通过修改或自定义等方式实现多种漂亮的效果,比如“人人网”手机客户端的个人主页中Tab标签是可以左右滑动的。